RIDING ADVICE / GUIDE
How to Avoid a Sore Bum When Riding a Motorcycle
Troubleshoot motorcycle seat discomfort, compare air, gel and foam cushions, and check pad fit, mounting and rider reach before long rides.
Reducing Seat Discomfort on Motorcycle Rides
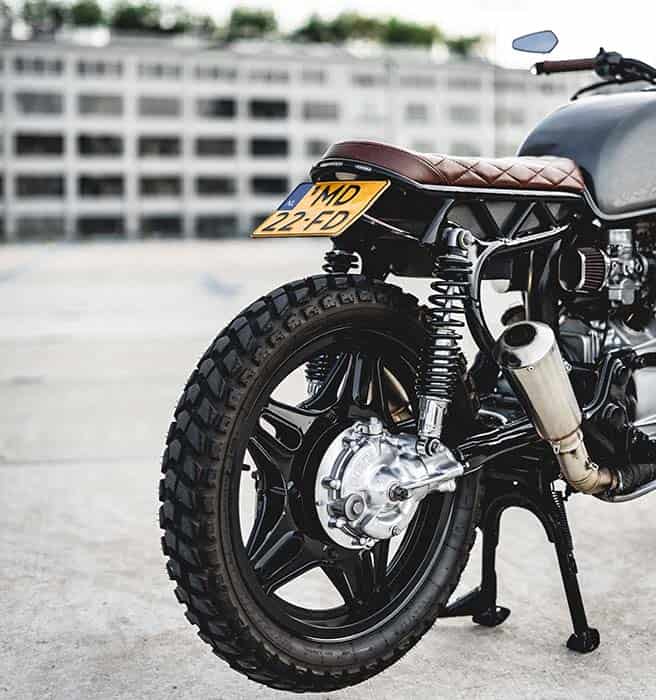
A sore bum can cut a motorcycle ride short. Start by checking when discomfort begins, where the seat presses, whether clothing bunches up, and how comfortably you reach the controls. A cushion is one option to try, alongside breaks and a better-fitting riding setup; it cannot guarantee pain relief or make an unsuitable seat fit every rider.
This is a research-based guide, not a hands-on cushion comparison or a diagnosis. If pain or numbness distracts you or affects control, stop somewhere safe rather than trying to ride through it. The NHS advises seeing a GP for pins and needles that persist or keep returning.
What to Check When the Seat Becomes Uncomfortable
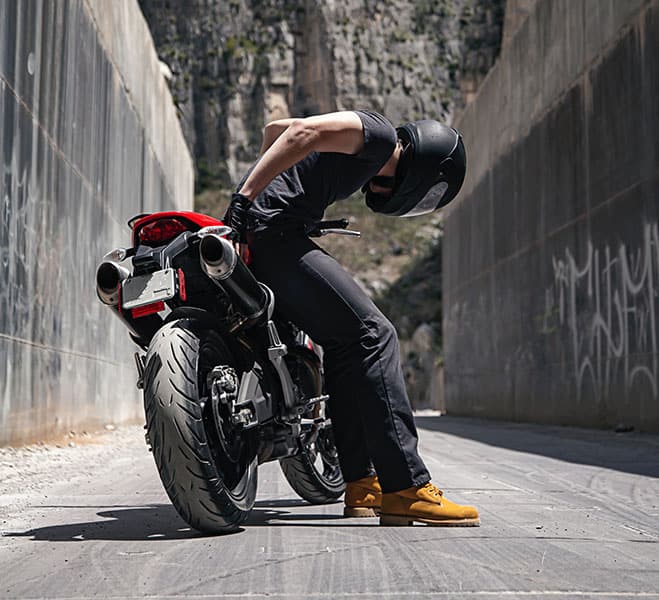
Look for a pattern before buying a replacement seat or pad:
- Time in the saddle: Note how long you have been riding when discomfort begins. Plan a stop before that point, and stop sooner if needed.
- Seat condition and shape: Check for damaged upholstery, compressed padding or a slope that keeps moving you away from your normal riding position.
- Clothing and heat: Check for bulky seams, damp clothing and bunched fabric while seated in your riding gear.
- Reach: Notice whether reaching the bars or controls forces you into an uncomfortable position. Seat width and height both matter when putting a foot down at a stop.
Do not assume that every pain or numb sensation comes from the seat. Persistent or recurring symptoms deserve medical advice rather than another accessory purchase.
Practical Starting Points
| Check | What to try |
|---|---|
| Riding position | Check that you can use the controls without straining. Follow the motorcycle manual for permitted adjustments; ask a qualified mechanic if unsure. |
| Clothing | Try smooth, well-fitting layers under protective riding gear. Extra padding is optional: check that it does not bunch or make your gear too tight. |
| Breaks | Plan places to get off the bike and walk around. Adjust the route or stop frequency if discomfort returns. |
| Seat fit | Look for support that suits your body and normal riding position without concentrated pressure, sliding or restricted movement. Neither “sit bones only” nor “the entire buttocks” is a universal fit rule. |
| Seat pad | Compare dimensions, mounting and the effect on your reach before choosing a material. Recheck the fit with your usual riding gear. |
Choosing the Right Motorcycle Seat
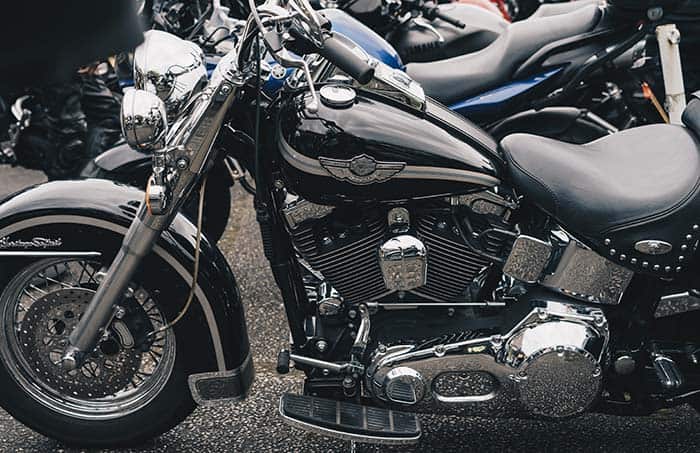
A replacement seat can change its contour, width and height as well as its padding. Compare those changes with your original seat, and check compatibility with your exact motorcycle. An aftermarket or custom seat is not automatically more comfortable. If possible, assess it while seated in your normal riding position before committing to it.
Look for a shape that lets you sit naturally, reach the controls and put a foot down securely at a stop. More width or softer padding is not always an improvement: either can change how you sit and move on the bike. A removable pad is a different option from rebuilding the seat with an insert; do not cut or alter the seat unless following suitable instructions with the necessary skills.
Choosing a Motorcycle Seat Cushion for Long Rides
Choose by fit and adjustment first, then material. Air, gel and foam describe different constructions, not a ranking of comfort or a promise of a longer pain-free ride.
| Cushion type | Selection points and limitations |
|---|---|
| Air | Inflation is adjustable while seated, following the maker’s instructions. Airhawk warns against overinflation and bottoming out. Check the bladder, valve and mounting before use. |
| Gel | A gel pad adds a shaped cushioning layer without an inflation adjustment. Its thickness and shape must suit the seat. Saddlemen warns that its SaddleGel pads retain heat or cold and should not be left exposed to hot sun for extended periods. Follow the exact pad’s care instructions. |
| Foam | Foam offers support through its shape and construction without a valve to adjust. Some seats combine firmer foam with a memory-foam layer. The word “foam” does not tell you the firmness or how much it compresses under you. Check thickness, contour and support while seated; a soft-feeling pad alone does not establish long-ride comfort. |
These distinctions draw on Airhawk’s setup guidance, Saddlemen’s gel-pad instructions and Sargent’s explanation of its foam construction. Manufacturer descriptions explain their own products; they are not independent evidence that one material will relieve your symptoms.
Measure the seat and the exact pad. Record the usable seat width and length in centimetres or inches, then compare them with the dimensions and outline of the specific pad size you are considering. Include front and rear widths for a tapered pad, plus its thickness or specified installed height. A size label such as “large” is not a measurement. A paper outline made from published dimensions can help you check placement before buying, but cannot establish comfort.
Airhawk measures seat width near the tailbone and length from the rear of the sitting area to where the seat narrows for the legs. Its pad covers the sitting area, not the entire saddle. Follow your selected maker’s sizing instructions; if dimensions or mounting requirements are missing, ask rather than guessing.
Check the mounting system. Follow the exact pad’s instructions for straps, hooks and attachment points. Make sure the seat latches correctly after installation. Keep straps and loose ends clear of the steering, controls, drivetrain, suspension, brakes, wheels and hot parts. Do not rely on a non-slip underside as a substitute for the specified mounting system. Saddlemen calls for checking for movement and strap interference at every stop; stop using a pad if its mounting loosens or seems insecure.
Set air pressure according to the manufacturer. There is no universal PSI. Airhawk calls for releasing air while seated normally until you sink into the pad without touching the seat base; wobbliness can indicate overinflation. Adjust only while stopped with the motorcycle securely supported, using assistance if needed to maintain balance. Follow the exact cushion’s procedure.
Do a short stopped fit check before riding:
- With the engine off and the motorcycle securely supported, sit in your usual riding gear. Check for pad overhang, folded edges, sliding or a new pressure point.
- Check how the pad’s added height and width affect your reach to the ground, handlebars, footpegs, brake pedal and gear lever. Confirm you can still operate the controls normally and support the motorcycle when stopped. Published pad thickness is not necessarily the height added under your weight.
- Recheck strap security, loose ends, seat latch and any valve closure. If the pad moves, obstructs anything or compromises your reach, correct the fit or remove it before riding.
Once the stopped checks pass, try a short familiar ride before planning a full day around the pad. Stop to reassess its position and your comfort; do not adjust it while moving. A pad cannot compensate for every seat or riding-position problem, and discomfort returning is a reason to reassess the ride rather than extend it.
Proper Riding Gear: Enhancing Comfort in the Saddle

Check clothing fit while seated, including any layers added for comfort. Keep protective riding gear in place and avoid seams or padding that bunch underneath you.
Padded Shorts and Pants
- Padded Shorts: These add another layer of padding, which may or may not suit your seat. Check the combined fit with your riding trousers and cushion before a long trip.
- Pants with Built-In Padding: Distinguish comfort padding from impact protectors. Extra seat padding does not establish crash protection; check the garment’s own specifications and fit.
Moisture-Wicking Fabrics
Riding can be sweaty work, especially during warm weather or intense rides. Moisture-wicking fabrics in your gear help keep you dry by pulling sweat away from your body. Check for damp or bunched layers during stops rather than assuming a fabric label will prevent discomfort.
Layering for Temperature Control
For year-round riding comfort, consider wearing multiple layers. This allows you to adjust your clothing according to the weather. In colder conditions, layering can help retain body heat, while in hot weather, you can shed layers to stay cool.
Proper Fit and Gear Maintenance
- Proper Fit: Ensure that your riding gear fits snugly but not too tight. Ill-fitting gear can cause discomfort and chafing. Consider professional fittings if needed.
- Maintenance: Regularly clean and maintain your riding gear, paying attention to padding and ventilation. Damaged or worn-out gear may lose its comfort and protective qualities.
Adjusting Your Riding Position: Finding the Sweet Spot

Properly adjusting your riding position can be a game-changer when it comes to avoiding a sore bum during motorcycle rides. It’s all about achieving an ergonomic posture that minimizes stress on your body. Here’s how to find that sweet spot:
Maintaining an Ergonomic Riding Position
- Handlebar and Footpeg Adjustments: Your bike may allow for some customization when it comes to handlebar and footpeg placement. Use only the adjustments permitted by the motorcycle manual, or get a qualified mechanic to help. Confirm full control operation after any change.
- Body Positioning: Pay attention to how you distribute your weight on the bike. Your feet should rest comfortably on the footpegs, and your hands should grip the handlebars with a relaxed, but not overly loose, grip. Use your core muscles to support your upper body rather than leaning heavily on your arms.
Body Movement
If you need to stretch or take weight off the seat, pull over safely and get off the motorcycle. Do not stand on the pegs or stretch your legs while riding as a comfort exercise. Make seat and posture adjustments while stopped, then check that you can still use all controls normally.
Frequent Breaks and Stretching: Revitalizing Your Ride

Plan breaks where you can park safely and get off the motorcycle, with time to rest and reassess your comfort. Here’s how to make the most of your stops:
The Importance of Taking Regular Breaks
- Rest: Stop before fatigue or discomfort interferes with riding.
- Reassess: Check clothing, seat-pad position and mounting while parked.
- Change the plan: Shorten or end the ride if you cannot continue comfortably and maintain control.
Moving Around During a Stop
Once safely parked and off the motorcycle, walk around and move gently within a comfortable range. Do not force a stretch through pain. Leave time to rest before deciding whether to continue.
Hydration and Nutrition
Staying hydrated and consuming nutritious snacks during breaks can significantly impact your comfort and stamina. Dehydration can lead to muscle cramps, so be sure to drink plenty of water. High-protein snacks like nuts or energy bars can help maintain your energy levels.
Plan Breaks Strategically
When planning your rides, incorporate breaks at scenic spots, rest areas, or places of interest. This not only improves your comfort but also enhances the overall experience of your ride.
Stay Flexible with Your Schedule
Remember that the goal is comfort and enjoyment, so don’t be too rigid with your riding schedule. Adjust your pace and break frequency according to your comfort level and the conditions on the road. A planned destination or mileage target is not a reason to continue when you need to stop.
Suspension and Bike Maintenance: Smooth Riding Ahead
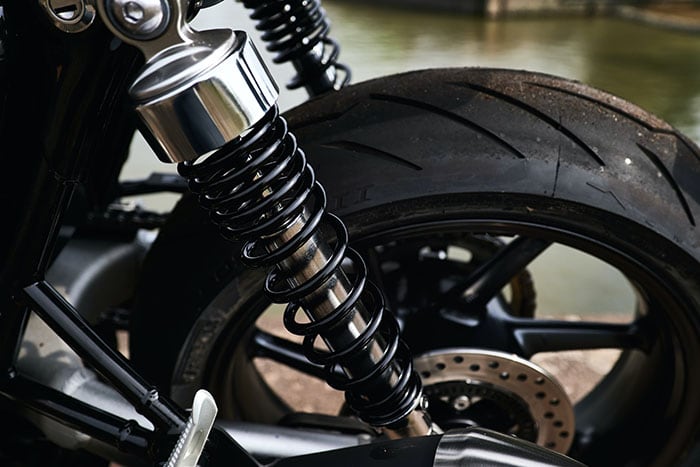
When troubleshooting ride discomfort, it’s essential to pay attention to your motorcycle’s suspension and overall maintenance. Properly maintained components can make a significant difference in your riding experience. Let’s delve into how suspension and maintenance contribute to a more comfortable journey:
Suspension Setup for Comfort
- Spring Preload: Adjusting the spring preload on your motorcycle’s suspension can help tailor it to your weight and riding style. A well-balanced suspension absorbs bumps and road imperfections, reducing jolts to your body.
- Damping Adjustments: Fine-tuning your suspension’s damping settings, such as rebound and compression, can make a substantial difference in ride comfort. Follow the motorcycle manual’s settings for your load and use, or ask a suspension specialist; avoid arbitrary changes for softness.
- Seek Professional Help: If you’re unsure about suspension adjustments, consider consulting a professional motorcycle mechanic or suspension specialist. They can provide expert guidance and ensure your suspension is optimized for your needs.
Tire Pressure and Maintenance
Maintaining proper tire pressure is critical for both safety and comfort. Do not lower tire pressure just to soften the ride. Follow your motorcycle manufacturer’s recommendations for tire pressure and check it regularly.
Lubrication and Chain Maintenance
A well-lubricated chain and properly maintained drivetrain reduce vibrations and enhance overall riding comfort. Regularly clean, lubricate, and tension your chain according to your motorcycle’s specifications.
Brake Maintenance
Efficient brakes contribute to a smoother ride. Ensure your brake pads, rotors, and brake fluid are in good condition. Brakes that are in top shape provide better control and reduce sudden stops that can lead to discomfort.
Regular Servicing
Scheduled maintenance, including oil changes, filter replacements, and inspections, is essential to keep your motorcycle running smoothly. Neglecting maintenance can lead to decreased performance and potential discomfort.
Balanced Wheels and Alignment
Proper wheel balance and alignment are crucial for a stable and comfortable ride. Unbalanced wheels can result in vibrations that contribute to rider fatigue and discomfort. By addressing suspension setup and maintaining your motorcycle regularly, you can significantly enhance your riding comfort. A well-maintained bike not only ensures a smoother ride but also increases safety on the road.
Long-Distance Riding Strategies: Conquering the Miles in Comfort

Long-distance motorcycle rides can be the ultimate test of comfort and endurance. To make those multi-day journeys more enjoyable and avoid a sore bum, you need to employ specific strategies. Let’s explore how to tackle the challenges of extended rides:
Planning Your Long-Distance Ride
- Route Selection: Plan your route carefully, considering road conditions, traffic, and scenic stops. Choose roads that offer a mix of riding experiences to prevent monotony.
- Rest Breaks: Plan regular rest breaks to get off the motorcycle, hydrate and rest; stop sooner if uncomfortable or tired. Use these breaks to evaluate your comfort and make any necessary adjustments.
Avoid Extended Periods Without a Stop
Break long stretches into manageable legs with safe stopping places. Get off the bike to walk or stretch; do not use standing or exaggerated seating changes while moving to extend the time between breaks.
Comfortable Riding Apparel
- Layer Clothing: Wear clothing that you can easily add or remove layers from to adapt to changing weather conditions. Being too hot or too cold can lead to discomfort.
- Wear Sun Protection: If riding in sunny conditions, use sunscreen and consider clothing with built-in UV protection to avoid sunburn.
Managing Discomfort During Multi-Day Trips
- Camping Gear: If you’re camping during your long trip, invest in quality sleeping gear like an air mattress or pad to ensure a good night’s rest.
- Stretching Routine: Develop a stretching routine that you can perform at the end of each riding day to relax your muscles and maintain flexibility.
- Recurring Symptoms: Seek medical advice for persistent or recurring symptoms instead of relying on a cushion to solve them. Ask a pharmacist or clinician about any medicine you already use and whether it affects riding.
Hydration and Nutrition
Stay well-hydrated and maintain a balanced diet during your long rides. Dehydration and poor nutrition can exacerbate discomfort and fatigue.
Mental Preparedness
Keep your itinerary flexible enough to stop early or end the day. Do not treat pain as an endurance target; a shorter ride is a reasonable response when your setup is uncomfortable.
Rider Fitness and Conditioning: Strengthening Your Ride

Ensuring your body is in top shape can have a profound impact on your comfort and endurance during motorcycle rides. Rider fitness and conditioning play a crucial role in reducing soreness and discomfort. Let’s delve into how you can strengthen your body for the road ahead:
The Significance of Physical Fitness
- Core Strength: General fitness can be part of preparing for riding, but core strength does not establish that a seat fits you. Incorporate exercises like planks and leg raises into your fitness routine.
- Flexibility: Flexibility is key to adapting to different riding positions and reducing muscle tension. Regular stretching exercises, such as yoga or Pilates, can help maintain flexibility.
- Endurance: Building endurance through cardiovascular exercises like cycling, running, or swimming can improve your overall stamina for long rides.
Exercises for Rider Fitness
- Squats: Squats strengthen your legs and core, providing better support while riding. They do not replace checking seat fit or taking breaks.
- Leg Raises: Leg raises target your lower abdominal muscles, helping to maintain a strong core for better posture.
- Yoga and Stretching: Choose a routine appropriate to your abilities; do not treat stretching as a guaranteed remedy for seat discomfort.
Build up riding time gradually and keep assessing comfort rather than aiming for a fixed distance. If changing clothing, taking breaks and checking the seat do not resolve the problem, reassess the setup and seek appropriate advice.
Sources and Research Limits
Reviewed 11 October 2026. These sources inform fit, construction and symptom boundaries. We have not hands-on tested the cushions, verified merchant offers or established comparative pain relief.
- Airhawk: How to measure your seat and inflate the cushion — seat measurements, mounting and seated air adjustment.
- Saddlemen: SaddleGel pad user guide, revision October 2022 — secure mounting, checks at stops and heat-retention cautions.
- Sargent: Zone Suspension with Body Contour Technology — an example of layered foam construction, not an independent comfort comparison.
- NHS: Pins and needles — seek medical advice for persistent or returning symptoms; do not self-diagnose.
Published
Explore more riding advice
KEEP EXPLORING
More for your next ride

Riding advice Article
Motorcycle Riding Drills: A Guide to Core Skills Practice
Plan motorcycle skills practice with primary training resources, clear limits for braking and turning, and guidance on when to work with an instructor.
Read article