Fine Tuning the Symphony of the Road – The Ultimate Guide to EQ Settings
Riding a motorcycle and listening to music are two passions that beautifully intertwine to create a harmonious experience on the road. An equalizer, or EQ, is a powerful tool in audio systems that manipulates frequencies to create the perfect sound. It has evolved from the tiny sliders on older systems to digital counterparts in modern devices. Mastering EQ settings on your motorcycle can be a game-changer, allowing you to customize your audio experience according to your preferences. In this article, we will dive into the world of motorcycle audio and explore the art of fine tuning EQ settings to unlock the full potential of your riding soundtrack.
The Role of EQ in Motorcycle Audio Systems
An equalizer, or EQ, is a powerful tool in audio systems that manipulates frequencies to create the perfect sound. It has evolved from the tiny sliders on older systems to digital counterparts in modern devices. Mastering EQ settings on your motorcycle can be a game-changer, allowing you to customize your audio experience according to your preferences.
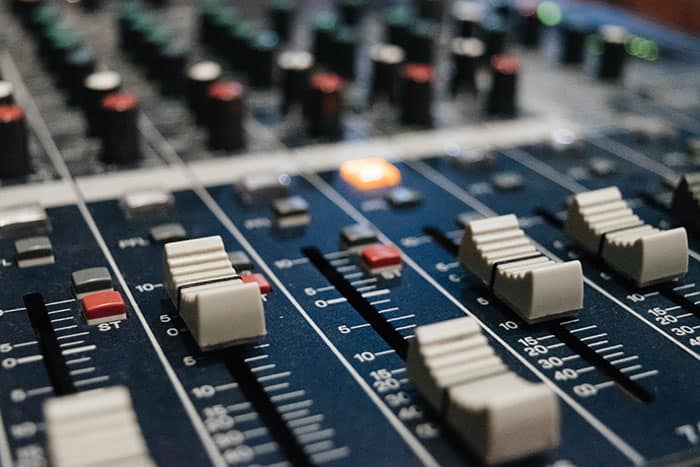
At its core, an equalizer modifies frequencies. Whether analog or digital, it adjusts different elements of sound to achieve a desirable audio output. Most people are familiar with the basic three levels of equalization — bass, mid, and treble. However, a more sophisticated EQ offers control over different sound registers for refined results.
Frequencies represent the speed of sound vibrations, with faster waves resulting in higher pitches. Measured in hertz (Hz), these frequencies range from 20Hz to 20kHz, approximately the spectrum of human hearing. Decibels (dB), on the other hand, reflect the volume level or loudness. When you adjust an EQ slider, you’re essentially manipulating the loudness of a particular frequency. Small dB changes can significantly impact the sound, so it’s advisable to start with a 1-2 dB change and adjust from there.
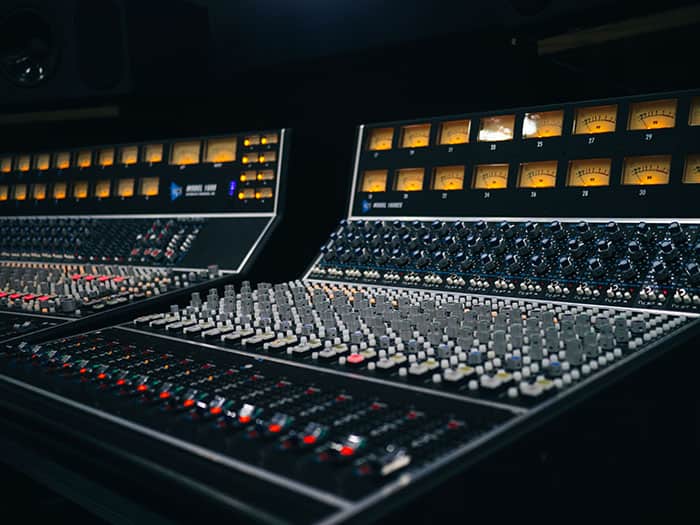
Overview of motorcycle audio systems

To optimize EQ settings, it’s essential to have the right audio hardware in place. Motorcycle audio systems typically consist of speakers, amplifiers, and source units. Understanding the capabilities and limitations of these components is crucial for achieving the best sound quality.
Choosing the right speakers and amplifiers
Selecting the appropriate speakers and amplifiers is paramount to achieving optimal audio performance. Factors such as power handling, frequency response, and impedance should be considered when choosing audio hardware. Additionally, waterproofing and durability are essential for ensuring longevity and reliability in various weather conditions.
Factors to consider for optimal sound quality
- Speaker placement and positioning: Proper speaker placement helps achieve balanced sound distribution and minimizes audio reflections. Experimenting with different mounting locations and angles can significantly improve the soundstage and imaging.
- Waterproofing and durability: Motorcycles are exposed to the elements, making it crucial to choose speakers and amplifiers that are specifically designed to withstand moisture, vibrations, and harsh conditions.
- Compatibility with motorcycle models: Ensure that the audio hardware you choose is compatible with your motorcycle’s electrical system and design. This will ensure seamless integration and reduce the risk of compatibility issues.
Step-by-step guide to tuning EQ settings

- Start with a neutral EQ: Begin by resetting all EQ settings to their default positions. This allows you to establish a baseline for adjustments.
- Adjust the low frequencies: Fine-tune the bass response by increasing or decreasing the low-frequency range. This helps achieve a desired level of impact and presence.
- Enhance the midrange frequencies: Modify the midrange frequencies to bring out the richness and warmth of vocals and instruments. This step contributes to a more balanced and natural sound reproduction.
- Fine-tune the high frequencies: Adjust the high-frequency range to improve the clarity and definition of cymbals, high notes, and other treble elements. Be mindful of harshness and avoid excessive brightness.
Different riding conditions demand adjustments to EQ settings to ensure optimal sound quality. Consider the following scenarios:
- City riding: In urban environments, where traffic noise is prevalent, increasing the midrange frequencies can help improve intelligibility and cut through the ambient noise.
- Highway cruising: On highways, wind noise becomes more pronounced. Boosting the low frequencies can compensate for the lack of bass response and add depth to the audio experience.
- Off-road adventures: Off-road riding introduces additional challenges such as engine noise and uneven terrain. Adjusting the EQ to prioritize midrange and high frequencies can help overcome these obstacles and maintain clarity.
Tailoring EQ settings to different genres of music can greatly enhance the listening experience. Consider the following recommendations:
- Rock and roll: Boosting the low frequencies can bring out the energy and impact of rock music, while maintaining clarity in the vocals and instruments.
- Classical: Emphasizing the midrange and high frequencies can accentuate the nuances and intricacies of classical compositions, allowing for a more detailed and immersive experience.
- Electronic music: Enhancing both the low and high frequencies helps capture the full spectrum of electronic music, highlighting the bass drops and shimmering highs.
Overcoming Challenges and Roadblocks
| Audio Issue | Environment | Solution |
|---|---|---|
| Background Noise | Noisy Environments | – Use noise-canceling headphones or speakers designed to reduce external noise. |
| – Adjust EQ to emphasize midrange and high frequencies for improved audibility. | ||
| Audio Distortion and Clipping | High Volume Settings | – Ensure EQ adjustments are moderate to prevent distortion. |
| – Calibrate the audio system to handle volume levels without clipping. | ||
| Troubleshooting Common Audio Issues | Motorcycle Audio | – Check wiring, connections, and power supply for poor sound quality or intermittent connectivity issues. |
| – Consult a professional motorcycle audio technician for efficient diagnosis and resolution of persistent issues. |
Dealing with Background Noise: Background noise can be a significant challenge when optimizing EQ settings for audio systems, particularly in noisy environments. This noise can arise from various sources, such as traffic, crowd chatter, or machinery, and can negatively impact the listening experience. To minimize the impact of background noise, consider using noise-canceling headphones or speakers. These specialized audio devices use technology to actively cancel out external noise, allowing you to hear your audio content with greater clarity.
In addition to using noise-canceling equipment, adjusting the equalization (EQ) settings can also help improve audibility in noisy environments. By emphasizing midrange and high frequencies, you can make the important audio content, such as vocals and instruments, more prominent, making it easier to hear and understand amidst the background noise. However, it’s essential to strike a balance, as overly aggressive EQ adjustments may lead to audio distortion.
Handling Audio Distortion and Clipping: Audio distortion and clipping are common issues that can occur when the EQ settings are improperly adjusted or when the audio system is pushed beyond its capabilities, especially at high volume settings. Audio distortion occurs when the audio signal is amplified excessively, leading to a harsh and unpleasant sound quality. On the other hand, clipping occurs when the volume level exceeds the maximum capacity of the audio system, causing the peaks of the audio waveform to be cut off, resulting in a distorted output.
To avoid these problems, it’s crucial to ensure that EQ adjustments are moderate and well-balanced. Extreme EQ settings that boost frequencies excessively can lead to distortion. Proper calibration of the audio system is also essential to prevent clipping. This calibration should be done based on the specific characteristics of the audio equipment and its capabilities.
Troubleshooting Common Audio Issues on Motorcycles: Motorcycle audio systems are exposed to unique challenges due to the open-air environment and vibrations. Common audio issues that riders may encounter include poor sound quality, distortion, or intermittent connectivity. When faced with such problems, a series of troubleshooting steps can be taken to diagnose and resolve the issues.
Firstly, it is advisable to check the wiring, connections, and power supply of the audio system. Loose or damaged connections can lead to poor sound quality or intermittent audio. Ensuring that all connections are secure and well-insulated can go a long way in improving audio performance.
If the issues persist even after checking the connections, it’s recommended to consult a professional motorcycle audio technician. A qualified technician will have the expertise and equipment to diagnose the problem efficiently. They can identify any underlying hardware or software issues with the audio system and carry out the necessary repairs or replacements.
By following these guidelines, individuals can enhance their audio experience in various environments and troubleshoot common audio problems effectively. Whether it’s tuning audio settings in noisy surroundings, avoiding distortion and clipping in high volume scenarios, or resolving audio issues on motorcycles, careful consideration and professional assistance can lead to a more enjoyable and hassle-free audio experience.
While optimizing EQ settings is essential for an immersive audio experience, rider safety should always remain a top priority. It is crucial to find the right balance between audio enjoyment and maintaining situational awareness on the road. Ensure that the volume level is set at a safe and reasonable level, allowing you to hear important traffic cues and emergency signals.

At XpertRider, Mike shares his expertise on the latest motorcycle technologies and products, offering in-depth reviews and comparisons to help riders make informed decisions when it comes to gear and accessories. His goal is to provide riders with the information they need to make the most out of their riding experience and stay safe on the road.
- Winter Riding Pants Motorcycle - February 25, 2024
- Europe Motorcycle Road Trips - December 3, 2023
- Motorcycle Slang and Terminology - November 28, 2023