Author name: Mike Thompson

Mike is a motorcycle engineer and designer who has a deep knowledge of all things motorcycles. He has worked with some of the biggest names in the industry and has a passion for creating innovative and functional gear for riders. At XpertRider, Mike shares his expertise on the latest motorcycle technologies and products, offering in-depth reviews and comparisons to help riders make informed decisions when it comes to gear and accessories. His goal is to provide riders with the information they need to make the most out of their riding experience and stay safe on the road.

Best Motorcycle to Learn On

The Ultimate Guide to Choosing the Best Motorcycle to Learn On

motorcycle to learn

The world of motorcycles is vast and varied, with different models, styles, and features to choose from. This abundance of choices can make the selection process feel overwhelming. Before you rush off to purchase your first motorcycle, it’s essential to understand what it takes to be a successful rider. To embark on your motorcycle journey, you need more than just a bike. You must arm yourself with knowledge, skills, and the right gear. In this guide, we’ll delve into the intricacies of choosing the best motorcycle to learn on.

What Makes a Motorcycle Beginner-Friendly?

A beginner-friendly motorcycle is easy to control, comfortable to ride, and forgiving of common beginner mistakes. These motorcycles are usually lightweight, which makes them easier to maneuver and less intimidating for new riders. They also typically have a lower seat height, allowing beginners to touch the ground with their feet when stationary, providing an added sense of security and control. Engine size is another critical factor that defines a beginner-friendly motorcycle.

Bikes with smaller engines are generally more suitable for beginners as they offer manageable power. This allows new riders to gradually build their confidence and skill without being overwhelmed. Finally, a beginner-friendly motorcycle should be affordable. As a beginner, you’re likely to make a few mistakes, possibly resulting in minor damages. Therefore, opting for a less expensive model can save you from costly repairs or replacements.

There’s no “one-size-fits-all” when it comes to choosing a beginner motorcycle. However, specific characteristics can make a bike more suitable for a beginner rider. These include:

AspectRange/Description
Weight300 – 400 lbs: Easier to handle for beginners
Engine size150 – 600cc: Offers sufficient power without overwhelming
PriceStarting from $1,500, varying based on size, type, brand
Speed80 – 130 mph: Manageable top speed for beginners
TechnologyEssential: Anti-Lock Braking System (ABS) enhances safety
ManufacturerChoose from reputable manufacturers with beginner options
CommunityJoin rider communities for support and camaraderie
TerrainConsider street, dirt, or both before selecting a bike

Essential Riding Gear

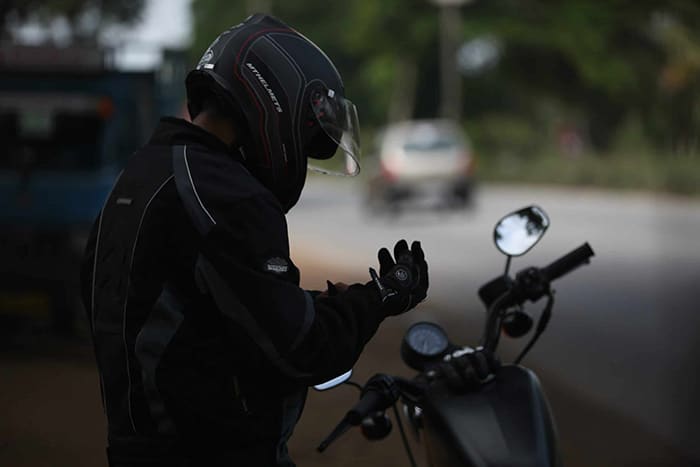
Once you’re equipped with a license and basic knowledge, the next step is to gather your riding gear. Seasoned riders often emphasize the importance of “ATGATT” or “All The Gear All The Time.” This advice might save your life in the worst-case scenario. Remember, when it comes to motorcycle gear, you’re not just buying clothing or accessories – you’re investing in your safety. Key gear includes:

  • A DOT-certified helmet, preferably a full-face helmet for maximum protection.
  • Motorcycle gloves for warmth, a firm grip, and protection in case of a crash.
  • A motorcycle jacket, long pants, or a full riding suit made from leather or ballistic nylon.
  • Footwear that covers your ankles to protect you from potential hazards.

Understanding Your Needs and Goals
it’s essential to gain a clear understanding of your needs and riding goals. Motorcycles come in various shapes and sizes, each catering to specific riding styles and purposes. Taking the time to assess your intentions and preferences will help you make an informed decision.

Identifying Your Riding Intentions:

  1. Commuting: If your primary purpose for getting a motorcycle is to commute to work or navigate through busy city streets, you’ll want a bike that is agile, fuel-efficient, and easy to handle in traffic. Look for motorcycles with good maneuverability and comfortable ergonomics to make daily rides a breeze.
  2. Weekend Rides: For those seeking to enjoy leisurely rides during weekends or on scenic routes, a motorcycle that offers a comfortable riding position and smooth power delivery is ideal. Consider bikes that excel in both urban and open-road conditions, ensuring an enjoyable experience on short and long rides alike.
  3. Adventure Touring: If your dreams involve embarking on long-distance journeys, exploring off-the-beaten-path destinations, and experiencing various terrains, adventure bikes are the way to go. Look for motorcycles equipped with features like large fuel tanks, adjustable suspension, and luggage carrying capacity to accommodate your touring aspirations.
  4. Cruising: If you prefer a relaxed and laid-back riding experience, cruiser motorcycles are a fantastic choice. These bikes are known for their low seat height, comfortable riding position, and classic styling. They are ideal for short rides around town or for simply cruising down scenic routes.

Assessing Your Physical Attributes and Limitations:

Motorcycles come in different sizes, and it’s essential to choose one that fits your physical attributes comfortably. Factors such as height, weight, and inseam length play a crucial role in determining the right motorcycle for you:

  1. Seat Height: A motorcycle’s seat height is a critical consideration, especially for beginners. Being able to place both feet flat on the ground while seated provides stability at stops, making it easier to manage the bike.
  2. Weight: The weight of the motorcycle affects how it feels and handles. A lighter bike can be more manageable for beginners, especially during low-speed maneuvers and parking.
  3. Ergonomics: Consider the overall ergonomics of the motorcycle, including handlebar height and positioning, footpeg placement, and seat comfort. An ergonomic fit will contribute to a more enjoyable and less fatiguing riding experience.

Setting a Budget:

Motorcycles come in a wide price range, and it’s essential to set a budget that aligns with your financial situation. Consider not only the upfront purchase cost but also ongoing expenses such as insurance, maintenance, and gear. While it may be tempting to go for high-end models, keep in mind that there are many excellent entry-level motorcycles that offer great value and performance.

By understanding your riding intentions, assessing your physical attributes, and setting a budget, you’ll be well-prepared to narrow down your choices and find the perfect motorcycle to kickstart your riding journey.

Types of Motorcycles for Beginners

Motorcycles come in various types, each designed to cater to different riding styles and preferences. As a beginner, it’s essential to choose a motorcycle that aligns with your skill level and intended use. Here are the main types of motorcycles for beginners:

Standard “Naked” Motorcycles

Standard motorcycles, also known as roadsters or naked bikes, are one of the most beginner-friendly options available. They are characterized by their simple and versatile design, making them suitable for various riding environments. Standard bikes typically have an upright riding position, comfortable ergonomics, and a neutral handlebar position, which allows for easy maneuvering in traffic.

Benefits of Standard Motorcycles for Beginners:

  • Easy to handle and control, making them ideal for learning the basics of riding.
  • Versatile and can handle different types of road conditions and riding scenarios.
  • Generally more affordable than specialized motorcycles, making them budget-friendly for beginners.

Cruiser Motorcycles

Cruiser motorcycles are well-known for their laid-back, relaxed riding style. They feature low seat heights, allowing riders to place their feet flat on the ground, enhancing stability at stops. Cruisers often boast classic styling with a focus on aesthetics and comfort. These bikes are popular among riders who enjoy leisurely cruises and laid-back riding experiences.

Benefits of Cruiser Motorcycles for Beginners:

  • Low seat height and relaxed riding position make them approachable for new riders.
  • Comfortable for short to medium distances, making them suitable for urban commuting and scenic rides.
  • Timeless aesthetics and customizability provide riders with an opportunity for personalization.

Adventure Bikes

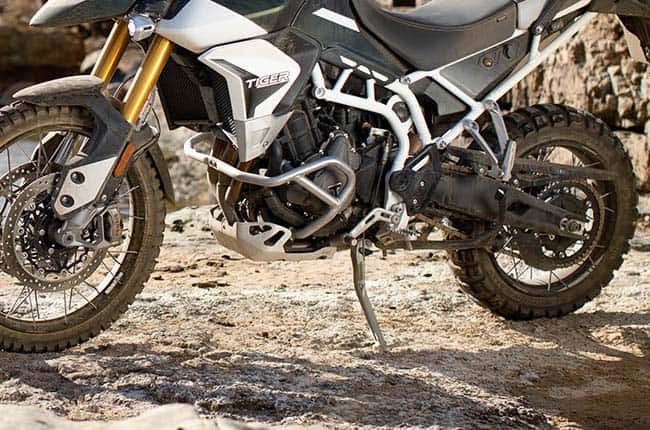
Adventure motorcycles, also known as ADV bikes, are designed for both on-road and off-road adventures. They feature a taller seat height, a more upright riding position, and longer suspension travel compared to standard motorcycles. Adventure bikes typically come equipped with features like skid plates, handguards, and sometimes even electronic aids for off-road riding.

Benefits of Adventure Bikes for Beginners:

  • Upright riding position provides better visibility and comfort, especially during long rides.
  • Versatile and capable of handling various terrains, making them suitable for riders interested in exploring diverse landscapes.
  • Adventure touring potential allows for extended trips and exploration of remote areas.

Sport Motorcycles

Sport motorcycles are built for high performance, featuring aggressive styling and powerful engines. However, they are not recommended as the first choice for beginners due to their sporty nature. Sport bikes have a more forward-leaning riding position, which can be uncomfortable for new riders. The powerful engines require experienced throttle control, making them potentially challenging for those just starting.

Note: If you’re an experienced rider with a background in smaller displacement motorcycles, a sport bike might be a viable option as you transition to more powerful machines.

As a beginner, it’s generally best to start with a standard, cruiser, or adventure bike. These types of motorcycles offer a more forgiving and user-friendly riding experience, allowing you to build confidence and skills gradually. Remember that each type has its advantages, so take your time to find the motorcycle that best suits your riding goals and preferences.

Dual-Sport Motorcycles

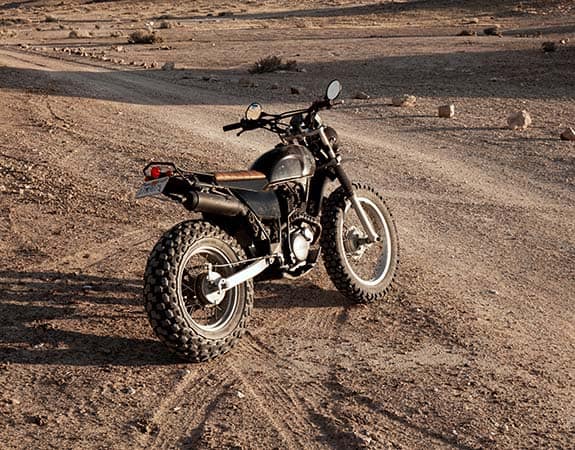
Dual-sport motorcycles, also known as dual-purpose bikes, are a subcategory of adventure bikes designed to handle both on-road and off-road riding. They share similarities with adventure motorcycles but are often lighter and more agile, making them better suited for off-road adventures and light trail riding. Dual-sport bikes usually have a taller seat height and longer suspension travel to tackle rough terrain effectively.

Benefits of Dual-Sport Motorcycles for Beginners:

  • Versatility for both on-road and off-road riding, allowing riders to explore various environments.
  • Lighter and more manageable than some adventure bikes, making them suitable for riders with a preference for off-road exploration.
  • Ideal for riders looking to develop their skills and gain experience in different riding conditions.

Dirt Bikes

Dirt bikes, also known as off-road motorcycles, are purpose-built machines designed exclusively for off-road riding. These bikes feature knobby tires, long suspension travel, and lightweight frames, enabling them to conquer rugged trails and challenging terrains. While dirt bikes can be a thrilling choice for experienced riders, they are generally not recommended for beginners due to their specialized nature and lack of street-legal features.

Benefits of Dirt Bikes for Experienced Riders:

  • Agility and nimbleness for navigating challenging off-road terrains and trails.
  • Ideal for motocross enthusiasts and those who enjoy off-road competition and riding in dedicated off-road areas.

Scooters

Scooters are an excellent option for beginner riders, especially for those who want a simpler and more convenient mode of transportation. Scooters are lightweight, have automatic transmissions, and offer a step-through design, making them easy to handle and accessible to riders of all experience levels.

Benefits of Scooters for Beginners:

  • Automatic transmission eliminates the need for shifting gears, simplifying the learning process.
  • Lightweight and easy to maneuver, making them ideal for urban commuting and short trips.
  • Often equipped with under-seat storage, adding practicality for carrying personal belongings.

Top Beginner-Friendly Motorcycles

There are numerous beginner-friendly motorcycles on the market, each with its unique features and benefits. Here are some top picks that stand out for their user-friendliness, affordability, and overall suitability for beginners:

  • Honda CB300R: This motorcycle is lightweight, easy to handle, and has a comfortable riding position. Its 286cc single-cylinder engine provides enough power for city riding and occasional highway trips.
  • Yamaha MT-03: This bike features a low seat height and a lightweight frame, making it easy to control for beginners. Its 321cc twin-cylinder engine offers a smooth and responsive ride.
  • Kawasaki Z400: Known for its excellent handling and comfortable riding position, the Z400 is a great choice for beginners. Its 399cc twin-cylinder engine provides a good balance of power and control.

Standard “Naked” Motorcycles: The Happy Medium

The standard or naked category of motorcycles are characterized by an upright riding position. Engine displacement typically falls between 450 and 650cc, and seat height maxes out at about 30 inches, making them an ideal choice for beginners.

Best Standard Motorcycles for Beginners:

  • Suzuki SV650: The SV650 has been a fan favorite, especially with the beginner rider crowd. It’s the right weight, power, and price for an entry-level standard motorcycle.
  • Honda CB300R: The Honda CB300R is a sporty, entry-level standard bike that comes in fun colors.
  • Yamaha SR400: The SR400 is a perfect entry-level bike that delivers on power, but not too much, and smooth rides.

Best Dual Sport Motorcycles for Beginners:

  • Suzuki DR 200: The Suzuki DR 200 is a reliable, low displacement bike that is perfect for the trail or as a daily commuter.
  • Kawasaki KLR650: This model has been around since the 80s and while it was mostly unchanged up until recently, it’s still a crowd favorite.
  • Honda CRF300L: The Honda CRF300L strikes the perfect balance between size, weight, power, and handling to get a beginner bike that is perfect for on or off-road.

Adventure Bikes: For the Adventurous Souls

Adventure bikes combine the best of off-road bikes with an on-road performance. They’re versatile enough to take anywhere, and you can find great beginner-friendly options.

Best Adventure Bikes for Beginners:

  • Kawasaki Versys-X 300 ABS: The Versys-X 300 ABS is ideal for your next adventure on the open road. It’s a compact, manageable bike that you’ll never have trouble handling.
  • Honda H’ness CB350: This bike combines vintage looks with modern performance and cutting-edge technology, delivering enjoyable rides for years to come.
  • BMW G 310 GS: The G 310 GS is a great beginner bike for anyone planning cross-country travel but may still be fairly new to biking.

Before making a final decision, take the time to thoroughly research various motorcycles that align with your preferences. Reading reviews, visiting motorcycle forums, and seeking advice from experienced riders can provide valuable insights.

Best Motorcycle to Learn On Read More »

Best Motorcycle Quick Shifter in 2024

From Clumsy to Confident: How Quick Shifters Will Transform Your Gear Shifting!

quick shifter

Explore the game-changing world of motorcycle quick shifters – seamless and lightning-fast gear changes without the clutch. Discover key components, safety features, and installation options in our comprehensive guide. Elevate your riding experience with expert insights. Whether you’re a spirited enthusiast seeking lightning-quick shifts or a casual rider looking to enhance your motorcycle’s performance, a well-designed quick shifter promises an immersive and thrilling journey on two wheels. Get ready to elevate your riding experience and enjoy the seamless joy of gear changes with the best motorcycle quick shifter by your side.

Why Use Quick Shifter in Motorcycles?

How Does a Quickshifter Work?

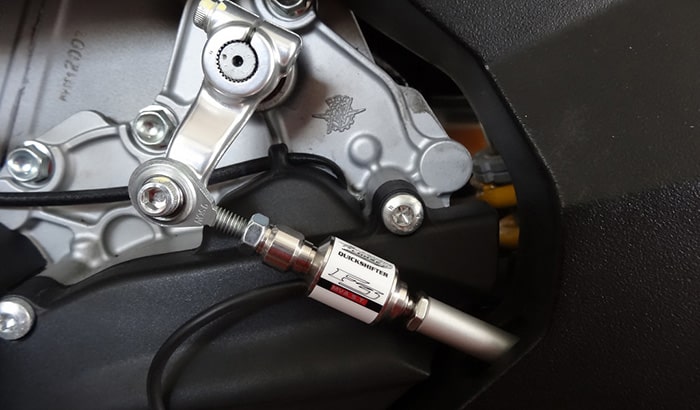
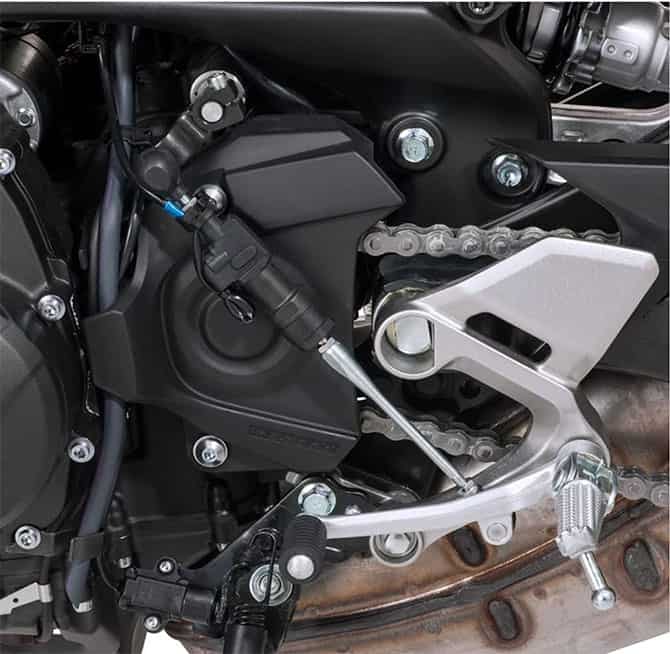
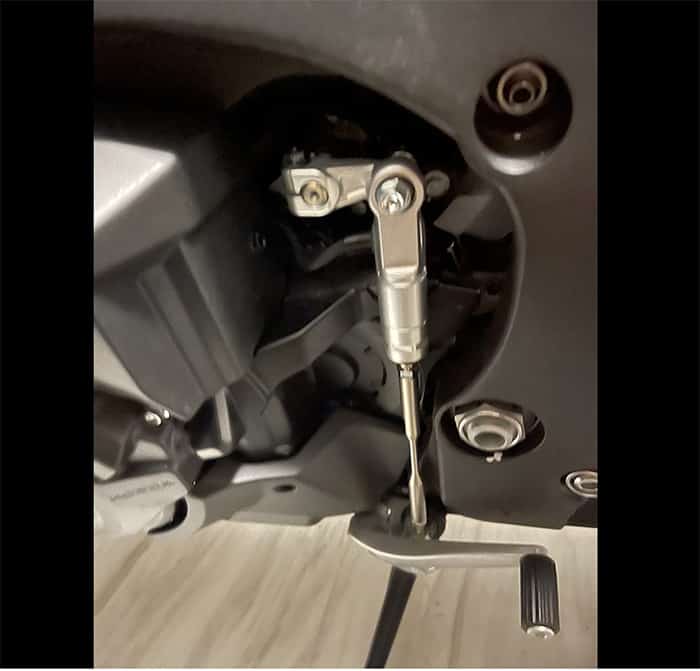
Quickshifters are made up of a sensor switch connected to the gearshift rod or lever. When the gear lever is pressed, the switch detects the pressure and preps the electronics for the gear shift. As the rider applies more pressure to activate the gear change, the switch momentarily interrupts the spark plugs, causing an effect similar to rolling off the throttle.

This process reduces the load on the gearbox, enabling the gear change. When the gearbox is under load, gear change is impossible. However, by using the clutch or rolling off the throttle, you create a break in load, allowing the gear to be changed. Quickshifters automate this process, doing all this within milliseconds. Each quickshifter manufacturer uses different technology and components to facilitate clutchless gear shifting.

The safety features incorporated into modern quick shifters, such as auto-blipper and over-rev protection, offer peace of mind, especially during intense riding conditions or when executing aggressive downshifts. These features not only enhance safety but also contribute to a smoother and more controlled ride.

Key Components of the Best Motorcycle Quick Shifter

ComponentDescription
Sensor Technology– Strain Gauges: High precision but may be sensitive to vibrations.
– Hall-effect Sensors: Durable but may lack the same level of precision.
– Inertia-based Sensors: Another type used in quick shifters.
– Combining sensor technologies for a more robust and accurate shifting experience.
ECU and Software– ECU: Processes sensor data and controls ignition cut and throttle blip (if equipped with auto-blipper functionality) during gear changes.
– Well-developed software algorithm to adapt to different riding styles and conditions for smooth and precise shifts.
Actuation Mechanism– Push-type Systems: More common and easier to install.
– Pull-type Systems: May require additional modifications.
– Choice of actuation mechanism can influence the overall riding experience and gear shifting speed.
Cut Time Adjustment– Cut Time: Duration of ignition cut off during gear shifts.
– Shorter cut time allows quicker shifts but may result in a harsher transition.
– Longer cut time provides smoother shifts at the expense of speed.
Sensitivity Adjustment– Ability to adjust sensitivity for fine-tuning the quick shifter to personal preferences.
– Riders with aggressive riding styles may prefer quicker and more responsive shifts.
– Those prioritizing smoothness may opt for slightly longer cut time.

Safety Features

  • Auto-Blipper Function – An auto-blipper is an additional feature present in some quick shifters, enabling automatic throttle blips during downshifts. When a rider downshifts without using the clutch, the auto-blipper momentarily blips the throttle, matching the engine speed to the lower gear’s ratio. This helps prevent rear-wheel lockup and aids in smoother downshifts, especially during aggressive riding or cornering.
  • Over-Rev Protection – One of the critical safety features of a quick shifter is over-rev protection. This feature prevents excessive engine RPM during missed shifts or improper gear engagement. When the ECU detects a potentially harmful situation, it intervenes by reducing the ignition cut duration or temporarily disabling the quick shifter to protect the engine from damage.
  • Kill Time Control – Kill time control is a feature that allows riders to adjust the duration of the ignition cut during gear changes. Fine-tuning the kill time can significantly impact the quick shifter’s behavior. Riders can find the balance between quick and aggressive shifts and preserving the longevity of the motorcycle’s transmission.

Installation and Compatibility

Plug-and-Play vs. Custom Installation

Motorcycle quick shifters are available in both plug-and-play and custom installation options. Plug-and-play quick shifters are designed to be compatible with specific motorcycle models and require minimal modifications for installation. Custom installation, on the other hand, may involve additional wiring and adjustments, which can be more time-consuming and require technical expertise.

Aftermarket vs. OEM Quick Shifters

Aftermarket quick shifters offer a wide range of options with various features and price points, providing riders with more choices to suit their preferences. OEM quick shifters, on the other hand, are designed and manufactured by the motorcycle’s original manufacturer, ensuring seamless integration and compatibility. Riders should consider factors like warranty, support, and compatibility when choosing between aftermarket and OEM options.

User Experience and Reviews

When selecting the best motorcycle quick shifter, it’s essential to consider user experiences and reviews. Reading feedback from other riders who have installed and used a particular quick shifter can offer valuable insights into its performance, reliability, and ease of use. Look for quick shifters with positive customer reviews and ratings to increase the chances of a satisfying purchase.

3 Famous Motorcycle Quick Shifters

Yamaha Quick Shifter

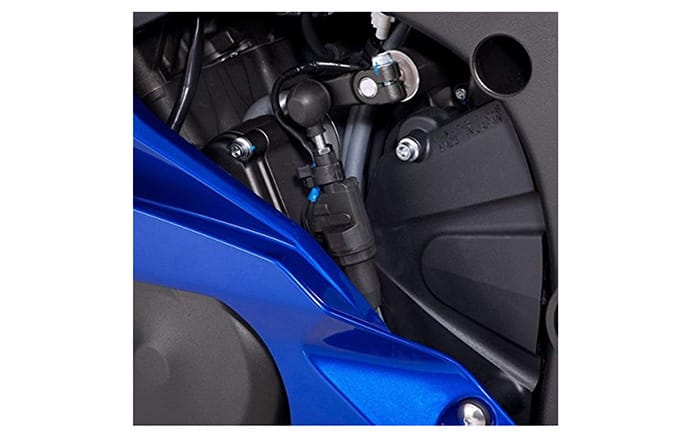
The Yamaha Quick Shifter Kit is a highly regarded addition to Yamaha R6, R1 motorcycles produced between 2017 and 2020. This quick shifter kit is designed to enhance rider control by limiting chassis movement, allowing for clutch-less shifting, and eliminating the need to come off the throttle. It is considered a significant game-changer for both street and track riding.

Furthermore, this kit is an OEM add-on, which means it does not require any modifications for installation. However, it’s worth noting that in California, this kit is only legal for use on racing vehicles. At present, the product seems to be out of stock, but customers can provide their email address to be notified when it becomes available again.

You can check out the Prices here.

Quick shifter

The Yamaha Quick Shift System (QSS) is a feature available on several models of Yamaha motorcycles, including the Yamaha YZF-R1, YZF-R6, MT-09, and MT-10. This system enables the rider to upshift at full throttle without using the clutch, offering a significant advantage in racing conditions and enhancing the overall riding experience.

It uses a sensor that detects when the shift lever is actuated, interrupting the ignition for a millisecond to enable a quick, smooth shift. The system is fully adjustable, allowing the rider to customize its operation to their personal preferences. Yamaha also offers a GYTR Quick Shifter Kit.

You can check out the Prices here.

Honda Quick Shifter

The Honda OEM Quick Shifter is another well-regarded component designed to enhance motorcycle performance, similar to the Yamaha GYTR Quick Shifter Kit. This Honda Quick Shifter is specifically designed for the CBR1000RR model motorcycles and allows for rapid up-shifting without the need for using the clutch. This race-style quick shifter is engineered to provide a higher level of sport performance, making it a popular choice for competitive riders.

You can check out the Prices here.

Best Motorcycle Quick Shifter in 2024 Read More »

100 OHM Resistor for Motorcycle

Understanding the 100 Ohm Resistor in Motorcycle Ignition Systems

100 ohm resistor

Many motorcycle riders are unfamiliar with motorcycle ignition systems, especially when it comes to understanding the role of the 100 ohm resistor. This crucial component is often overlooked, yet it plays a vital role in preventing hot-wiring and theft. Our comprehensive guide will explore the specifics of the 100 ohm resistor, its function, and how it can sometimes be bypassed. In order to activate the Capacitive Discharge Ignition (CDI), the resistor creates a lower voltage. This voltage difference is detected by the bike’s Electronic Control Unit (ECU) and allows the spark plugs to be powered. If a prospective thief tries to hot-wire the bike, the full 12 volts would be applied and the ECU would prevent the spark plugs from firing, thus thwarting the theft attempt.

100 OHM Resistor

Before we delve into the integration of a 100 ohm resistor in a motorcycle, it is essential to grasp the concept of resistors. A resistor is a passive two-terminal electrical component that resists the flow of current in a circuit. It is commonly used to control or limit the current to other components, ensuring they operate within safe limits. A 100 ohm resistor refers to its resistance value, which is measured in ohms (Ω).

It indicates that the resistor will impede the current flow to a specific degree, allowing only a certain amount of current to pass through. In motorcycle applications, resistors are used to prevent issues like voltage spikes, excessive current, and damage to sensitive components. They also enable compatibility between components designed for different voltage levels.

Kawasaki and the Igntion Resistor

The ignition resistor is a component used in some Kawasaki motorcycle models to control the flow of current to the ignition switch. It is designed to limit the current that passes through the ignition switch, preventing wear and tear on the switch and ensuring proper ignition system operation. However, it’s important to note that not all Kawasaki models are equipped with this resistor. The inclusion of the ignition resistor depends on the specific model and the country in which the motorcycle is purchased.

The connection of a Resistor to an Engine Control Unit (ECU)

The connection of a resistor to an Engine Control Unit (ECU) is a specific application where resistors are used to modify signals or inputs sent to the ECU. This modification can be done for various purposes, such as engine tuning, sensor simulation, or troubleshooting. Let’s explore some common scenarios where resistors are connected to an ECU:

  • Sensor Simulation: In some cases, you may need to simulate a sensor’s output to the ECU to test the ECU’s response or diagnose potential issues. For example, if a sensor has failed, you can use a resistor to simulate its output within the expected range. This is often referred to as “bench testing” the ECU.
  • Engine Tuning and Modifications: In engine tuning, resistors can be used to modify sensor signals to achieve specific performance goals. For instance, if you are tuning the air-fuel ratio, you might use resistors to alter the signal from the oxygen sensor to make the ECU adjust the fuel injection accordingly.
  • Troubleshooting and Diagnostics: Resistors can be employed during troubleshooting to isolate issues with certain sensors or circuits. By connecting a resistor in place of a sensor, you can check if the ECU responds correctly without the sensor’s input.
  • Sensor Bypass: In some situations, a faulty sensor might cause the ECU to enter a failsafe mode or limp mode, leading to reduced performance or a complete shutdown. A properly sized resistor can be temporarily connected to bypass the faulty sensor, allowing the ECU to function correctly.

You can check out the Prices of Engine Control Unit (ECU) here.

It’s important to note that connecting a resistor to an ECU requires a good understanding of the ECU’s wiring diagram and the specific sensor or circuit you are working with. Using incorrect resistor values or improper connections can lead to adverse effects on the ECU and the overall performance of the vehicle.

Additionally, modifying the ECU with resistors for tuning purposes should be done with caution and expertise. Custom tuning can affect the engine’s reliability, emissions, and overall longevity, and it may also void warranties or violate emissions regulations in some regions.

Symptoms of a Failing Ignition Resistor

Symptoms of a Failing Ignition ResistorDescription
Engine Cranks But Won’t StartThe engine cranks when attempting to start the motorcycle, but it fails to ignite or start properly.
Intermittent Starting IssuesMotorcycle may start normally at times but experience starting problems on other occasions.
No Response from Starter MotorThe starter motor shows no movement or sound when trying to start the bike.
Engine StallingThe motorcycle’s engine stalls unexpectedly while riding due to ignition circuit interruption.
Electrical System Appears NormalDespite the issue, other electrical components (lights, indicators) seem to function normally.
No Ignition System CodesModern motorcycles may not display specific error codes for ignition resistor failure.
Resistor Damage or CorrosionVisible signs of damage, burning, melting, or corrosion may be present on the ignition resistor.
Electrical SmellA distinct electrical smell may be noticeable when the ignition resistor overheats or burns.
Electrical Noise or ClickingUnusual electrical noises or clicking sounds may be heard near the ignition system during startup.
Failure to Start After RestingThe motorcycle may start after resting, indicating inconsistent current handling by the resistor.

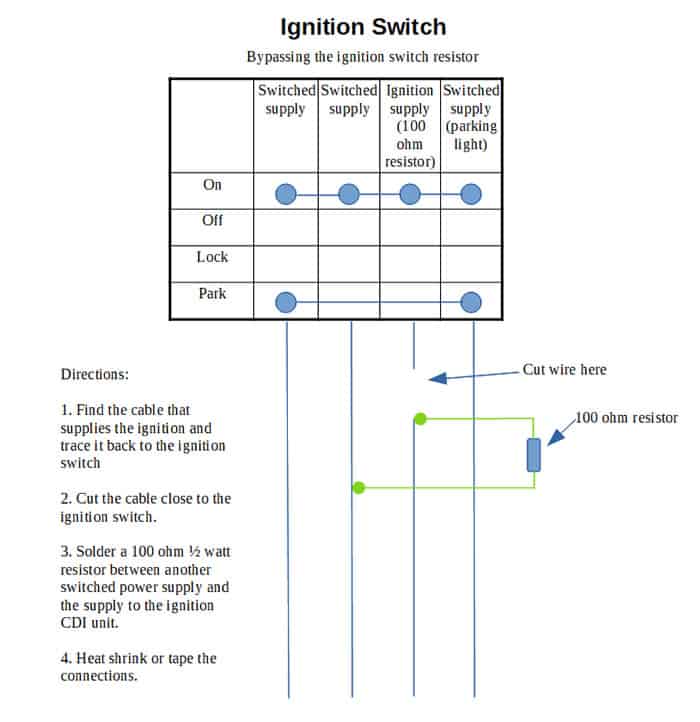
Bypassing the Ignition Switch Resistor

While resistors are generally reliable, failure is a possibility. If the ignition switch resistor does fail, it will need to be bypassed or replaced to get the bike running again. This can be a DIY project if you have some electrical knowledge and the right tools, but if you’re unsure, it may be best to consult a professional.

Necessary Tools and Parts

To bypass the ignition switch resistor, you’ll need the following tools and parts:

  • A 100 ohm, 1/2 watt resistor
  • Soldering iron
  • Solder
  • Wire of the same gauge as your current switch wire
  • Heat shrink
  • Heat gun (a hairdryer may also suffice)

The Bypass Process

To bypass the ignition switch resistor, follow these steps:

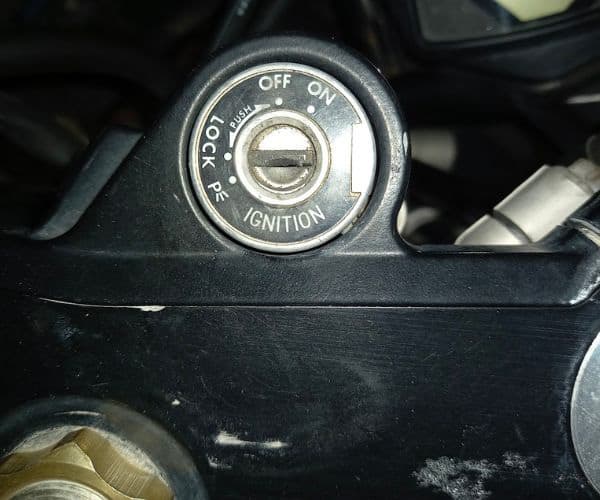
  1. Remove the ignition switch. The original resistor is located at the bottom of the ignition switch and will need to be accessed. Consult your bike’s manual if you’re unsure how to do this.
  2. Identify and disconnect the resistor wire. On most bikes, this will be a grey wire, but it’s always best to double-check.
  3. Identify a suitable switched power cable. This cable must be a switched power supply, meaning it only has voltage when the ignition key is turned.
  4. Connect the resistor. The new resistor will be connected between the switched power supply and the cable you removed from the ignition switch.
  5. Solder and protect the connections. The connections should be soldered together and covered with heat shrink for protection.

The 100-ohm resistor in motorcycle ignition switches serves a vital role in preventing hot-wiring and theft. Understanding its function and knowing how to bypass it when necessary can save you considerable frustration and help keep your bike secure. As always, if you’re unsure about performing any of these steps yourself, consult with a professional to avoid damaging your bike’s electrical system.

100 OHM Resistor for Motorcycle Read More »

Best EQ Settings for Motorcycle

Fine Tuning the Symphony of the Road – The Ultimate Guide to EQ Settings

eq settings

Riding a motorcycle and listening to music are two passions that beautifully intertwine to create a harmonious experience on the road. An equalizer, or EQ, is a powerful tool in audio systems that manipulates frequencies to create the perfect sound. It has evolved from the tiny sliders on older systems to digital counterparts in modern devices. Mastering EQ settings on your motorcycle can be a game-changer, allowing you to customize your audio experience according to your preferences. In this article, we will dive into the world of motorcycle audio and explore the art of fine tuning EQ settings to unlock the full potential of your riding soundtrack.

The Role of EQ in Motorcycle Audio Systems

An equalizer, or EQ, is a powerful tool in audio systems that manipulates frequencies to create the perfect sound. It has evolved from the tiny sliders on older systems to digital counterparts in modern devices. Mastering EQ settings on your motorcycle can be a game-changer, allowing you to customize your audio experience according to your preferences.

At its core, an equalizer modifies frequencies. Whether analog or digital, it adjusts different elements of sound to achieve a desirable audio output. Most people are familiar with the basic three levels of equalization — bass, mid, and treble. However, a more sophisticated EQ offers control over different sound registers for refined results.

Frequencies represent the speed of sound vibrations, with faster waves resulting in higher pitches. Measured in hertz (Hz), these frequencies range from 20Hz to 20kHz, approximately the spectrum of human hearing. Decibels (dB), on the other hand, reflect the volume level or loudness. When you adjust an EQ slider, you’re essentially manipulating the loudness of a particular frequency. Small dB changes can significantly impact the sound, so it’s advisable to start with a 1-2 dB change and adjust from there.

Overview of motorcycle audio systems

To optimize EQ settings, it’s essential to have the right audio hardware in place. Motorcycle audio systems typically consist of speakers, amplifiers, and source units. Understanding the capabilities and limitations of these components is crucial for achieving the best sound quality.

Choosing the right speakers and amplifiers

Selecting the appropriate speakers and amplifiers is paramount to achieving optimal audio performance. Factors such as power handling, frequency response, and impedance should be considered when choosing audio hardware. Additionally, waterproofing and durability are essential for ensuring longevity and reliability in various weather conditions.

Factors to consider for optimal sound quality

  1. Speaker placement and positioning: Proper speaker placement helps achieve balanced sound distribution and minimizes audio reflections. Experimenting with different mounting locations and angles can significantly improve the soundstage and imaging.
  2. Waterproofing and durability: Motorcycles are exposed to the elements, making it crucial to choose speakers and amplifiers that are specifically designed to withstand moisture, vibrations, and harsh conditions.
  3. Compatibility with motorcycle models: Ensure that the audio hardware you choose is compatible with your motorcycle’s electrical system and design. This will ensure seamless integration and reduce the risk of compatibility issues.

Step-by-step guide to tuning EQ settings

  1. Start with a neutral EQ: Begin by resetting all EQ settings to their default positions. This allows you to establish a baseline for adjustments.
  2. Adjust the low frequencies: Fine-tune the bass response by increasing or decreasing the low-frequency range. This helps achieve a desired level of impact and presence.
  3. Enhance the midrange frequencies: Modify the midrange frequencies to bring out the richness and warmth of vocals and instruments. This step contributes to a more balanced and natural sound reproduction.
  4. Fine-tune the high frequencies: Adjust the high-frequency range to improve the clarity and definition of cymbals, high notes, and other treble elements. Be mindful of harshness and avoid excessive brightness.

Different riding conditions demand adjustments to EQ settings to ensure optimal sound quality. Consider the following scenarios:

  1. City riding: In urban environments, where traffic noise is prevalent, increasing the midrange frequencies can help improve intelligibility and cut through the ambient noise.
  2. Highway cruising: On highways, wind noise becomes more pronounced. Boosting the low frequencies can compensate for the lack of bass response and add depth to the audio experience.
  3. Off-road adventures: Off-road riding introduces additional challenges such as engine noise and uneven terrain. Adjusting the EQ to prioritize midrange and high frequencies can help overcome these obstacles and maintain clarity.

Tailoring EQ settings to different genres of music can greatly enhance the listening experience. Consider the following recommendations:

  1. Rock and roll: Boosting the low frequencies can bring out the energy and impact of rock music, while maintaining clarity in the vocals and instruments.
  2. Classical: Emphasizing the midrange and high frequencies can accentuate the nuances and intricacies of classical compositions, allowing for a more detailed and immersive experience.
  3. Electronic music: Enhancing both the low and high frequencies helps capture the full spectrum of electronic music, highlighting the bass drops and shimmering highs.

Overcoming Challenges and Roadblocks

Audio IssueEnvironmentSolution
Background NoiseNoisy Environments– Use noise-canceling headphones or speakers designed to reduce external noise.
– Adjust EQ to emphasize midrange and high frequencies for improved audibility.
Audio Distortion and ClippingHigh Volume Settings– Ensure EQ adjustments are moderate to prevent distortion.
– Calibrate the audio system to handle volume levels without clipping.
Troubleshooting Common Audio IssuesMotorcycle Audio– Check wiring, connections, and power supply for poor sound quality or intermittent connectivity issues.
– Consult a professional motorcycle audio technician for efficient diagnosis and resolution of persistent issues.

Dealing with Background Noise: Background noise can be a significant challenge when optimizing EQ settings for audio systems, particularly in noisy environments. This noise can arise from various sources, such as traffic, crowd chatter, or machinery, and can negatively impact the listening experience. To minimize the impact of background noise, consider using noise-canceling headphones or speakers. These specialized audio devices use technology to actively cancel out external noise, allowing you to hear your audio content with greater clarity.

In addition to using noise-canceling equipment, adjusting the equalization (EQ) settings can also help improve audibility in noisy environments. By emphasizing midrange and high frequencies, you can make the important audio content, such as vocals and instruments, more prominent, making it easier to hear and understand amidst the background noise. However, it’s essential to strike a balance, as overly aggressive EQ adjustments may lead to audio distortion.

Handling Audio Distortion and Clipping: Audio distortion and clipping are common issues that can occur when the EQ settings are improperly adjusted or when the audio system is pushed beyond its capabilities, especially at high volume settings. Audio distortion occurs when the audio signal is amplified excessively, leading to a harsh and unpleasant sound quality. On the other hand, clipping occurs when the volume level exceeds the maximum capacity of the audio system, causing the peaks of the audio waveform to be cut off, resulting in a distorted output.

To avoid these problems, it’s crucial to ensure that EQ adjustments are moderate and well-balanced. Extreme EQ settings that boost frequencies excessively can lead to distortion. Proper calibration of the audio system is also essential to prevent clipping. This calibration should be done based on the specific characteristics of the audio equipment and its capabilities.

Troubleshooting Common Audio Issues on Motorcycles: Motorcycle audio systems are exposed to unique challenges due to the open-air environment and vibrations. Common audio issues that riders may encounter include poor sound quality, distortion, or intermittent connectivity. When faced with such problems, a series of troubleshooting steps can be taken to diagnose and resolve the issues.

Firstly, it is advisable to check the wiring, connections, and power supply of the audio system. Loose or damaged connections can lead to poor sound quality or intermittent audio. Ensuring that all connections are secure and well-insulated can go a long way in improving audio performance.

If the issues persist even after checking the connections, it’s recommended to consult a professional motorcycle audio technician. A qualified technician will have the expertise and equipment to diagnose the problem efficiently. They can identify any underlying hardware or software issues with the audio system and carry out the necessary repairs or replacements.

By following these guidelines, individuals can enhance their audio experience in various environments and troubleshoot common audio problems effectively. Whether it’s tuning audio settings in noisy surroundings, avoiding distortion and clipping in high volume scenarios, or resolving audio issues on motorcycles, careful consideration and professional assistance can lead to a more enjoyable and hassle-free audio experience.

While optimizing EQ settings is essential for an immersive audio experience, rider safety should always remain a top priority. It is crucial to find the right balance between audio enjoyment and maintaining situational awareness on the road. Ensure that the volume level is set at a safe and reasonable level, allowing you to hear important traffic cues and emergency signals.

Best EQ Settings for Motorcycle Read More »

How to Bypass the Kickstand Safety Switch on a Motorcycle?

Mastering Motorcycle Mechanics: How to Bypass the Kickstand Safety Switch

kickstand safety switch

When it comes to motorcycle safety, certain features are designed to protect riders and prevent accidents. One such feature is the kickstand safety switch, which ensures that the motorcycle cannot be ridden while the kickstand is down. While this switch serves an important purpose, there may be situations where riders find it necessary to bypass the kickstand safety switch temporarily. In this article, we will explore the function of the kickstand safety switch, discuss when bypassing may be necessary, and provide guidance on how to do it safely.

Understanding the Kickstand Safety Switch

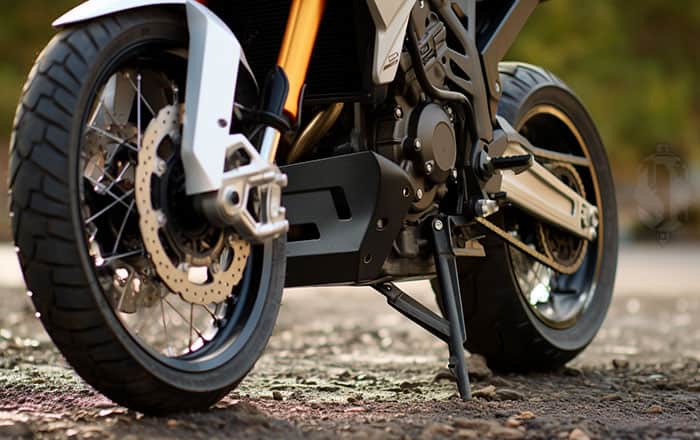
The kickstand safety switch is a simple yet effective device that prevents a motorcycle from being ridden while the kickstand is engaged. When the kickstand is down, it activates the switch, interrupting the electrical circuit and disabling the engine’s ignition system. The switch is usually located near the kickstand pivot point or attached to the kickstand itself. This safety feature is intended to prevent accidents caused by riding with the kickstand deployed, which can lead to loss of control or the kickstand striking the road surface during turns.

In addition to its primary function, the kickstand safety switch is interconnected with other components of the motorcycle’s electrical system. By disabling the ignition system, it also prevents starting the engine while the kickstand is down, ensuring rider safety.

Assessing the Need for Bypassing

While the kickstand safety switch serves an important purpose, there may be instances where riders find themselves needing to bypass it temporarily. Common situations include working on the motorcycle, such as during maintenance or repairs, or participating in activities that require the engine to run with the kickstand down, like testing or adjusting certain components.

It’s important to note that bypassing the kickstand safety switch should not be taken lightly. The switch is in place to protect riders and prevent accidents. However, understanding the circumstances in which bypassing may be necessary can help riders make informed decisions.

Before proceeding with any bypassing actions, it’s crucial to consider the potential risks and consequences involved. Bypassing the kickstand safety switch may compromise rider safety if the bike is ridden with the kickstand down inadvertently. Additionally, it’s important to ensure compliance with local laws and regulations regarding motorcycle modifications.

Precautions and Safety Measures

Prioritizing rider safety is paramount when considering bypassing the kickstand safety switch. Here are some precautions and alternative safety measures to keep in mind:

  1. Proper maintenance and inspection: Regularly inspect the kickstand mechanism, ensuring it is in good working condition. Lubricate moving parts to prevent sticking or failure. By keeping the kickstand in optimal shape, you reduce the need for bypassing the switch.
  2. Backup safety measures: Implement alternative safety measures to compensate for the bypass. For example, using a sturdy wheel chock or motorcycle stand can prevent the bike from tipping over when parked with the kickstand up. These measures provide an extra layer of protection.
  3. Rider responsibility: It is the rider’s responsibility to ensure that the kickstand is fully retracted before riding. Develop a habit of double-checking and visually confirming the kickstand’s position before engaging the engine.

Bypassing the Kickstand Safety Switch

If, after careful consideration and assessment, you find it necessary to bypass the kickstand safety switch, follow these steps:

  1. Gather the necessary tools: Before starting, ensure you have the appropriate tools for the job. You may need a set of wrenches, pliers, wire connectors, and electrical tape.
  2. Locate the kickstand safety switch: Depending on the motorcycle model, the switch is typically found near the kickstand pivot point or attached to the kickstand itself. Refer to the motorcycle’s service manual for precise location details.
  3. Disconnect the electrical connection: Using pliers or the appropriate tool, disconnect the electrical connection from the kickstand safety switch. This disconnection interrupts the electrical circuit responsible for disabling the ignition system.
  4. Insulate and secure the wires: To prevent accidental contact and short circuits, insulate the exposed wire ends using electrical tape or heat shrink tubing. Secure the wires in a manner that ensures they won’t interfere with other motorcycle components or moving parts.
  5. Test the bypass: With the electrical connection to the kickstand safety switch disconnected and properly insulated, attempt to start the motorcycle with the kickstand down. If the engine starts successfully, the bypass has been effective.

Troubleshooting and Common Issues

After bypassing the kickstand safety switch, it’s important to remain vigilant and watch for any potential issues that may arise. Here are some common problems and troubleshooting tips:

  1. Engine stalling: If the engine stalls when putting the bike into gear with the kickstand up, ensure that the clutch lever is pulled in fully. Some motorcycles have an additional safety feature that requires the clutch to be engaged before shifting into gear.
  2. Ignition system malfunction: If you experience issues with the ignition system after bypassing the switch, double-check all wire connections and ensure they are securely fastened. Loose or faulty connections can disrupt the electrical circuit and prevent proper engine operation.
  3. Warning lights: In some cases, bypassing the kickstand safety switch may trigger warning lights on the motorcycle’s instrument cluster. Consult the motorcycle’s service manual or contact a professional technician to diagnose and address the issue.

Legal and Ethical Considerations

It’s essential to understand the legal and ethical implications of bypassing the kickstand safety switch. While the specifics may vary depending on your location, modifying or bypassing safety features mandated by regulations can have legal consequences. Always consult local laws and regulations to ensure compliance and ride responsibly.

Furthermore, it’s important to consider the ethical aspects of bypassing safety mechanisms. Motorcycle manufacturers design their bikes with rider safety in mind. Altering or bypassing safety features can introduce unnecessary risks. It’s crucial to exercise caution and make informed decisions that prioritize safety.

Conclusion

The kickstand safety switch plays a vital role in ensuring rider safety by preventing accidents caused by riding with the kickstand deployed. While bypassing the switch should be approached with caution, there are circumstances where it may be necessary. By understanding the function of the kickstand safety switch, assessing the need for bypassing, taking necessary precautions, and adhering to legal and ethical considerations, riders can make informed decisions that prioritize safety.

Remember, bypassing the kickstand safety switch should be done responsibly and with a thorough understanding of the potential risks involved. When in doubt, consult professional technicians or motorcycle experts to ensure proper modifications and maintain the highest level of safety on your rides.

Here is another article on – How to Bypass Neutral Safety Switch on a Motorcycle?

How to Bypass the Kickstand Safety Switch on a Motorcycle? Read More »

How to Bypass Neutral Safety Switch on a Motorcycle?

Mastering Motorcycle Mechanics: Bypassing the Neutral Safety Switch

neutral safety switch

As motorcycle enthusiasts, we are constantly seeking ways to optimize our riding experience and unleash the full potential of our machines. One component that plays a crucial role in motorcycle safety is the neutral safety switch (NSS). It is designed to prevent accidental starts while the motorcycle is in gear, ensuring that we engage the clutch and achieve a smooth and controlled ride. However, there are situations where riders may consider bypassing the NSS to gain more control over their motorcycles. In this article, we will explore the ins and outs of bypassing the neutral safety switch, offering valuable insights and guidance to fellow riders.

What is Neutral Safety Switch?

Before delving into the bypassing process, let’s take a moment to understand the purpose and function of the neutral safety switch. The neutral safety switch (NSS) is an important component installed in motorcycles and other vehicles with manual transmissions. Its primary function is to prevent the engine from starting when the transmission is in gear, thus ensuring the safety of the rider and preventing accidental movement of the vehicle.

The NSS is typically located near the transmission or clutch assembly and is integrated into the vehicle’s electrical system. It consists of a series of wires, connectors, and a switch mechanism that operates based on the position of the gear shifter and the clutch pedal. When the transmission is in neutral or the clutch is fully disengaged, the NSS sends a signal to the starter relay or ignition switch, allowing the engine to start normally. However, when the transmission is in gear or the clutch is partially engaged, the NSS interrupts the signal, preventing the engine from starting.

The purpose of the NSS is to ensure that the engine starts only when it is safe to do so. It helps prevent unintentional movement of the vehicle when starting, reducing the risk of accidents, damage to the transmission, or injury to the rider. By requiring the transmission to be in neutral or the clutch to be fully disengaged, the NSS serves as a vital safety feature that promotes responsible and controlled operation of the motorcycle. In addition to its primary role in preventing accidental starts, the NSS may also be interconnected with other systems, such as the reverse gear or the vehicle’s computerized control module. In such cases, the NSS ensures that these systems function properly and engage only when the transmission is in the appropriate position.

It is important to note that tampering with or bypassing the NSS can have significant safety implications. Modifying or bypassing safety features should be approached with caution and only undertaken by experienced individuals who fully understand the risks involved. Prior to making any modifications, it is advisable to consult the motorcycle manufacturer, professional mechanics, or authorized technicians to ensure the safety of both the rider and the motorcycle.

Reasons for Bypassing the Neutral Safety Switch

While the neutral safety switch is an important safety feature, there are scenarios where experienced riders may consider bypassing it. One such situation is during off-road riding or racing, where rapid and frequent shifts between gears are necessary. Bypassing the NSS allows riders to start the motorcycle in gear without having to disengage the clutch fully, enhancing their control and responsiveness. However, it is crucial to emphasize that bypassing the NSS removes a safety feature designed to prevent accidental starts in gear, which can lead to loss of control, accidents, or damage to the motorcycle. Here are a few reasons why riders might consider bypassing the neutral safety switch:

  1. Off-Road Riding or Racing: Off-road riding and racing often require rapid shifts between gears and quick restarts. In such situations, bypassing the NSS allows riders to start the motorcycle in gear without fully disengaging the clutch. This can provide an advantage in terms of improved control, responsiveness, and reduced time between gear changes.
  2. Customization and Performance Modifications: Motorcycle enthusiasts who engage in extensive customization or performance modifications might bypass the NSS to accommodate specific aftermarket parts or modifications that may not align with the NSS’s intended function. This allows riders to tailor their motorcycles to their preferences while taking full control over the starting process.
  3. Mechanical or Electrical Issues: In certain cases, the NSS may become faulty or malfunction due to mechanical or electrical issues. If the NSS is causing persistent problems, bypassing it temporarily can be a troubleshooting method to identify whether the issue lies within the NSS or in another component of the motorcycle’s electrical system.
  4. Emergency Situations: While not encouraged, there could be emergency situations where a rider needs to start the motorcycle quickly and bypassing the NSS becomes a necessary measure. These situations may include being stranded in a dangerous area or needing to move the motorcycle to a safer location swiftly.

Step-by-Step Guide to Bypassing the Neutral Safety Switch

Disclaimer: Bypassing the neutral safety switch should only be undertaken by experienced riders with a thorough understanding of motorcycle mechanics. It is crucial to exercise caution and ensure that all necessary safety precautions are taken. Always consult the motorcycle manufacturer or professional technicians for guidance specific to your motorcycle model.

  1. Preparation: Gather the required tools and materials, such as a multimeter, wire strippers, electrical tape, and a wiring diagram or service manual for your motorcycle.
  2. Identification: Locate the neutral safety switch on your motorcycle. Consult the wiring diagram or service manual to identify the NSS wires and their colors.
  3. Disconnecting: Begin by disconnecting the motorcycle’s battery to ensure safety. Carefully disconnect the wires connected to the NSS, ensuring you keep track of their original positions.
  4. Rerouting: Determine the appropriate method for rerouting the NSS wires based on your motorcycle’s design. This may involve splicing the wires or creating a bypass circuit. Refer to the wiring diagram or service manual for guidance.
  5. Securing the Bypassed Connection: Once the NSS wires are rerouted, ensure that the bypassed connection is secure. Properly insulate and protect the wires using electrical tape or heat shrink tubing, minimizing the risk of electrical shorts or damage.
  6. Testing: Before reconnecting the motorcycle’s battery, test the bypassed NSS connection. Engage the clutch and attempt to start the motorcycle in gear, ensuring that it starts only when the clutch is fully disengaged or in neutral. Conduct thorough testing to verify the bypassed NSS functionality.

In essense find the wire to the NSS swtich, check if its normally open(NO) or normally closed (NC), then either bride it or cut it. By doing this remember, if the motorbike in gear it will start imediately and take off without clutch pulled in.

Safety Considerations and Legal Implications

Bypassing the neutral safety switch comes with inherent risks. By modifying a safety feature, riders assume responsibility for their actions and must be aware of potential consequences. It is important to understand that bypassing the NSS may result in accidental starts in gear, which can lead to loss of control and accidents. Moreover, modifying or bypassing safety features may have legal implications and could impact insurance coverage. Riders should carefully consider the risks and consult local laws and regulations before proceeding.

As an experienced motorcycle rider with a background in mechanical engineering, I strongly recommend seeking professional advice or assistance when considering bypassing the neutral safety switch. Experienced mechanics, authorized technicians, or motorcycle manufacturers can provide valuable insights specific to your motorcycle model, ensuring your safety and the integrity of your machine. Your safety should always be the top priority, and it is essential to balance your desire for enhanced control with responsible decision-making.

In conclusion motorcycle neutral safety switch plays a vital role in safety, preventing accidental starts in gear and ensuring a smooth and controlled ride. While bypassing the NSS may offer advantages in specific scenarios, it should only be undertaken by experienced riders who fully understand the risks involved. Responsible decision-making and maintaining overall motorcycle safety should always be the guiding principles. Remember, seeking professional advice is essential to ensure your safety and the well-being of your motorcycle.

How to Bypass Neutral Safety Switch on a Motorcycle? Read More »

Scroll to Top